
Flossing
Let's be honest: flossing with braces feels impossible sometimes. It's frustrating, time-consuming, and often feels like a battle you're destined to lose. But it’s a battle you need to fight. Braces create a lot of nooks and crannies where food particles and plaque love to hide, and those brackets are serious obstacles to getting floss where it needs to go.
This isn't just about avoiding a little embarrassment from visible food stuck in your teeth. Neglecting to floss properly while wearing braces significantly increases your risk of developing cavities and gum disease. The areas around your brackets are particularly vulnerable, and inflammation of the gums – gingivitis – is common if you don't stay on top of your oral hygiene.
Thankfully, the world of orthodontic hygiene has come a long way. It’s not just about struggling with waxed floss and a prayer anymore. New tools and techniques have emerged to make flossing with braces more manageable, and even, dare I say, easier. We’ll walk through everything you need to know to keep your smile healthy during your orthodontic treatment.

Traditional Floss: Still Viable?
Don't completely write off traditional floss just yet. It can still be used effectively with braces, but it requires a different technique than you might be used to. The key is getting the floss under the archwire and between each tooth, which is where the challenge lies.
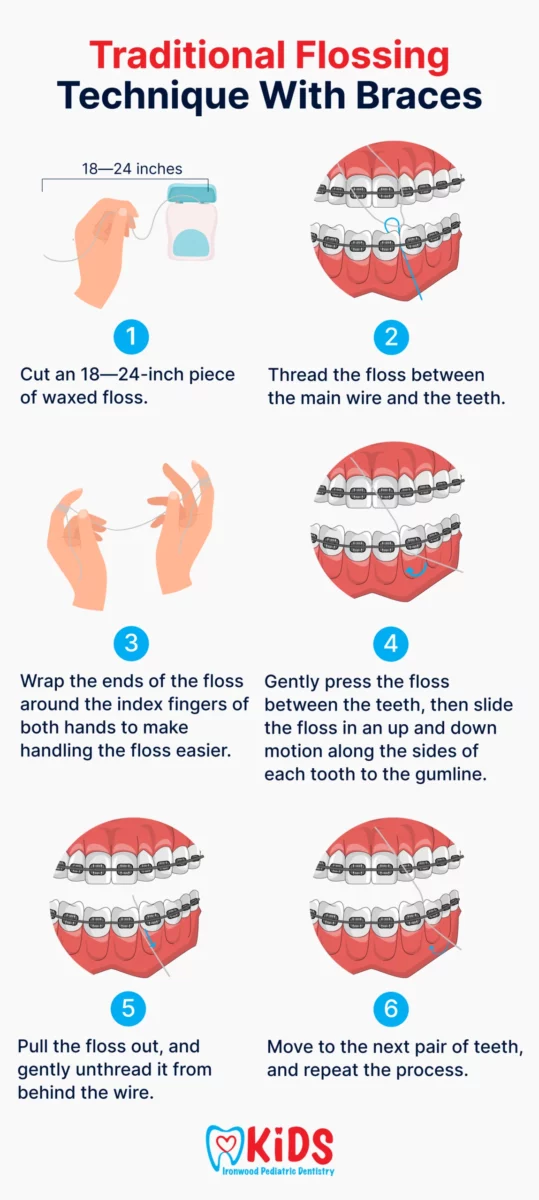
The 'threading' method is the standard approach. You’ll need to use a floss threader – more on those later – to guide the floss underneath the archwire. Once the floss is under the wire, you can gently work it between your teeth, using a back-and-forth motion to remove plaque and debris. Be sure to curve the floss around each tooth in a 'C' shape, getting just below the gumline.
This method takes practice, and it's perfectly normal to struggle at first. Expect some soreness and even a little bleeding, especially in the initial stages. This usually subsides as your gums adjust to the flossing routine. Some people find waxed floss easier to work with, as it slides more smoothly between teeth and under the archwire, but unwaxed floss can also be effective. Experiment to see what works best for you.
Floss Threaders: Your New Best Friend
If you're finding traditional flossing with braces a nightmare, then floss threaders are about to become your new best friend. These small, plastic tools are designed to simplify the process of getting floss under the archwire, making it significantly easier to clean between your teeth.
Here's how they work: you simply thread a length of floss through the loop of the floss threader, then guide the threader (with the floss attached) under the archwire. Once the floss is in place, remove the threader and use the floss as you normally would, curving it around each tooth and cleaning along the gumline.
The difference is remarkable. It transforms a fiddly, frustrating process into a relatively quick and straightforward one. There are two main types of floss threaders: disposable ones, which are inexpensive and convenient, and reusable ones, which are more eco-friendly and can be used multiple times. I recommend starting with disposable ones to get the hang of the technique, then switching to reusable if you prefer. You can find packs of 100 disposable threaders for around $5 on Amazon.
Here's a step-by-step guide to using a floss threader:
1. Thread the floss: Take about 18 inches of floss and thread it through the loop of the floss threader.
2. Guide under the archwire: Carefully guide the floss threader under the archwire, between two teeth.
3. Remove the threader: Once the floss is under the wire, gently remove the floss threader, leaving the floss in place.
4. Floss as usual: Use the floss to clean between your teeth and along the gumline, using a 'C' shape.
5. Repeat: Repeat the process for each tooth, using a clean section of floss each time.
- Thread the floss: Take about 18 inches of floss and thread it through the loop of the floss threader.
- Guide under the archwire: Carefully guide the floss threader under the archwire, between two teeth.
- Remove the threader: Once the floss is under the wire, gently remove the floss threader, leaving the floss in place.
- Floss as usual: Use the floss to clean between your teeth and along the gumline, using a 'C' shape.
- Repeat: Repeat the process for each tooth, using a clean section of floss each time.
Interdental Brushes: Reaching Tight Spots
Interdental brushes, sometimes called 'proxy brushes,' are small brushes designed to clean between your teeth. They're different from floss in that they don’t rely on a thin strand to get into tight spaces; instead, they use small bristles to scrub away plaque and debris. They can be particularly useful for cleaning around brackets where floss struggles to reach.
These brushes come in a variety of sizes, so it's important to choose the right one for your needs. Your orthodontist can help you determine the appropriate size, but generally, you want a brush that fits comfortably between your teeth without forcing it. Forcing a brush that's too large can damage your gums.
To use an interdental brush, gently insert it between your teeth and move it back and forth, using a gentle scrubbing motion. Be careful not to apply too much pressure, as this can irritate your gums. Rinse the brush thoroughly after each use. They're a great addition to your routine but shouldn’t replace flossing entirely.
Water Flossers: A Powerful Addition
Water flossers, like the Waterpik Aquarius, use a pressurized stream of water to remove food particles and plaque from between your teeth and around your braces. They've become increasingly popular in recent years, and for good reason: they're easy to use and can be particularly helpful for people with limited dexterity or who find traditional flossing difficult.
The benefits are clear. A water flosser can reach areas that floss misses, and the pulsating water stream can help to stimulate your gums. They’re also a good option for people who have trouble with the manual dexterity required for traditional flossing. However, it’s important to remember that a water flosser is a supplement to flossing, not a replacement.
While water flossers are effective at removing debris, they may not remove all plaque as effectively as traditional floss. They can also be messy, and require electricity to operate. The Waterpik Aquarius, a popular model, typically costs around $80-$100. It's important to be realistic about what a water flosser can do – it's a valuable tool, but it shouldn't be your only line of defense against cavities and gum disease.
Featured Products

Features 10 pressure settings for a customized clean · Includes 7 interchangeable tips for various oral care needs · ADA Accepted for effective plaque removal
This top-rated water flosser offers extensive customization and proven effectiveness, making it ideal for navigating the complexities of cleaning around braces.
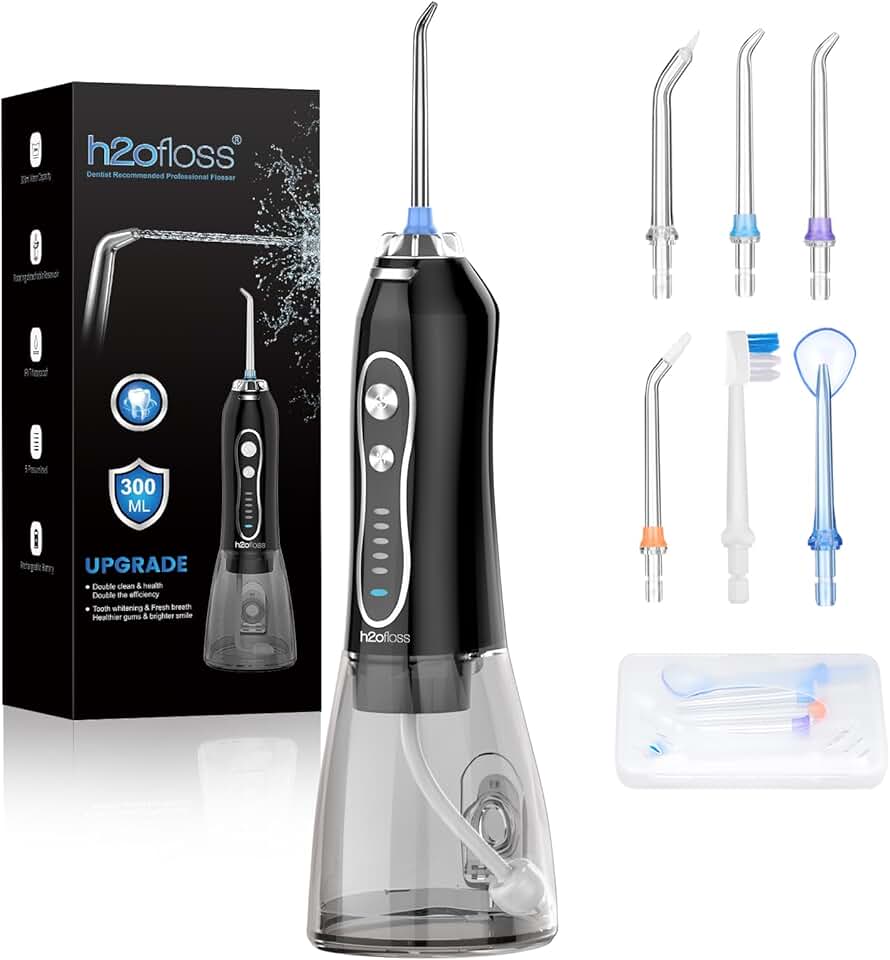
Offers 5 distinct cleaning modes · Portable and rechargeable design with a 300ml water tank · IPX7 waterproof rating for safe use
A budget-friendly and portable option, this water flosser provides multiple modes to adapt to your specific needs while traveling or at home.
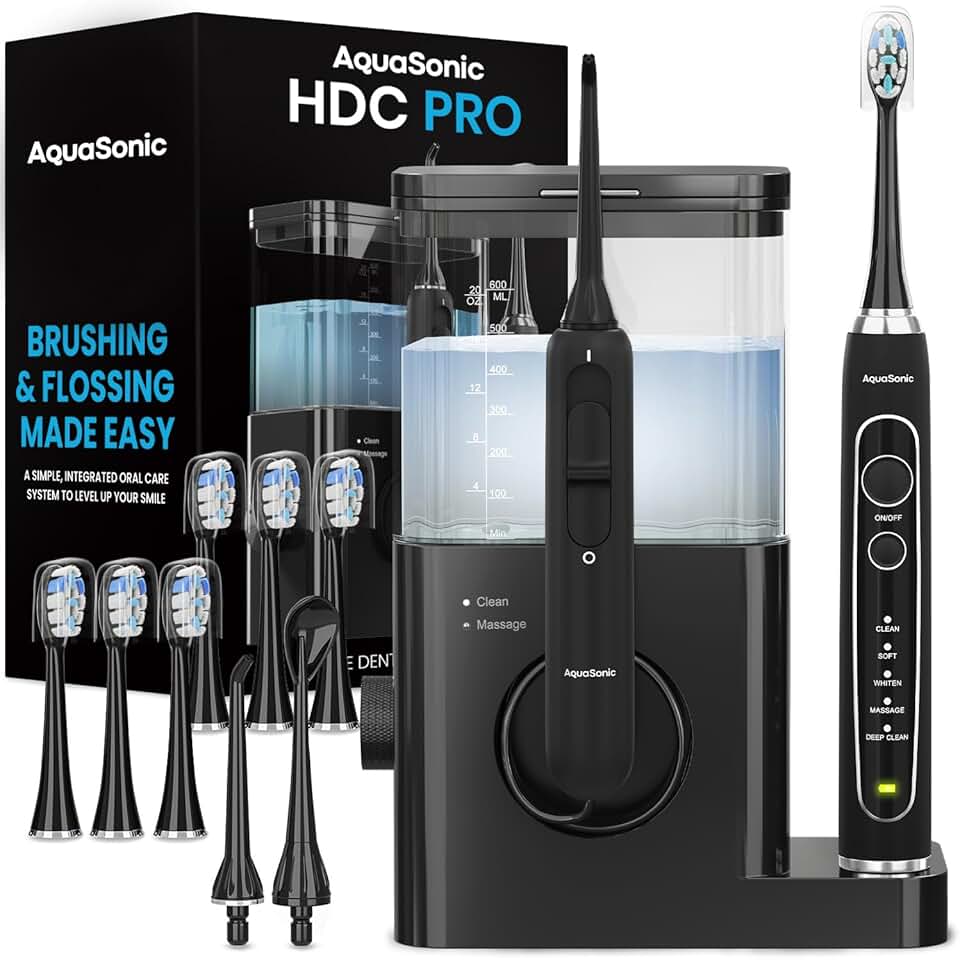
Combines a power toothbrush and a water flosser in one device · Designed for easier brushing and flossing · Aims to promote whiter teeth and healthier gums
This all-in-one dental center simplifies your routine by integrating brushing and flossing, offering a comprehensive approach to oral hygiene with braces.
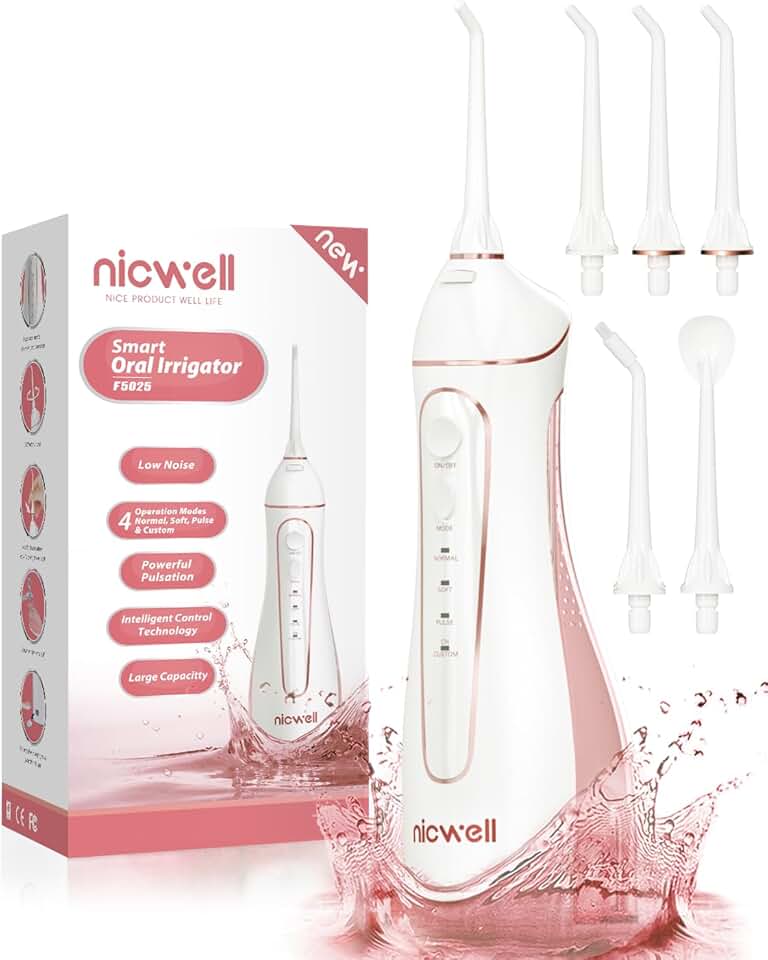
Features 4 distinct cleaning modes · Cordless, portable, and rechargeable with long battery life · IPX7 waterproof construction for durability
This cordless water flosser is a convenient and effective tool for maintaining oral hygiene around braces, offering multiple modes for a personalized clean.

Compact and portable design for travel · Includes 4 cleaning modes and a removable water tank · IPX7 waterproof for safe and easy cleaning
Its mini size and portability make this water flosser an excellent choice for maintaining excellent oral hygiene, especially around braces, even when on the go.
As an Amazon Associate I earn from qualifying purchases. Prices may vary.
Top Tools for 2026: Our Picks
After testing and researching the latest options, here are some of the best flossing tools available in 2026. These picks are based on effectiveness, ease of use, and value for money.
Oral-B Super Floss: ($8 for a pack of 3) This floss is specifically designed for braces, with a stiffened end for threading, a spongy floss section for cleaning around brackets, and regular floss for cleaning between teeth. It’s a versatile option, but can be a little tricky to use at first. Pros: Versatile, affordable. Cons: Can be difficult to thread.
Waterpik Aquarius Water Flosser: ($90) As mentioned before, this is a powerful and effective water flosser that’s easy to use and offers multiple pressure settings. Pros: Easy to use, effective at removing debris. Cons: Can be messy, requires electricity.
Cocar Floss Threaders: ($10 for 100) These disposable floss threaders are a convenient and affordable way to get floss under your archwire. Pros: Inexpensive, easy to use. Cons: Disposable, not eco-friendly.
GUM Interdental Brushes: ($7 for 8 brushes) Available in a variety of sizes, these brushes are great for cleaning between teeth and around brackets. Pros: Effective at cleaning tight spaces, gentle on gums. Cons: Requires choosing the right size.
Troubleshooting Common Flossing Problems
Flossing with braces isn't always smooth sailing. You're likely to encounter a few challenges along the way. Here's how to deal with some common problems.
Floss Getting Stuck: If your floss gets stuck between your teeth or around a bracket, don’t force it. Gently try to wiggle it free, or use a floss threader to help guide it out. Forcing it can damage your gums or even your braces.
Bleeding Gums: It's common for your gums to bleed when you first start flossing with braces, especially if you haven't been flossing regularly. This usually stops as your gums become healthier. Continue flossing gently and consistently, and the bleeding should subside. If it persists, consult your orthodontist.
Soreness: Your gums may be sore after flossing, especially if you've been neglecting your oral hygiene. This is usually temporary. Use a soft-bristled toothbrush and a gentle flossing technique. If the soreness is severe or doesn't improve, see your orthodontist. Remember, consistent, gentle care is key. Don’t hesitate to reach out to your orthodontist if you’re experiencing persistent problems – they can offer personalized advice and guidance.


No comments yet. Be the first to share your thoughts!